Elias Haslanger
  • Home
  • Shows
  • Music
  • Bio
  • Press
  • Church on Monday
  • Saxophone Lessons

Saxophone lessons with Elias Haslanger

Elias has over 30 years of experience performing and teaching music with degrees in music performance and composition. Elias gives lessons in his home studio over a high-speed internet connection.

Sign Up

Reeds

7/26/2019

0 Comments

 
Picture
Reeds. Ask a saxophone player about reeds and be prepared to sit and listen. In fact, if you have a couch or a chair, it might be helpful to get comfortable because you may be there awhile listening to the trials and tribulations of which reeds work, which reeds don't work, how the weather change has really screwed things up, or how they just don't make 'em like they used to... Yeah, reeds can be a real source of frustration for woodwind players. In this post, I go into some detail about my method for working on and selecting a reed which I learned from the master saxophonist Harvey Pittel.

I only play Rico reeds. Yes, I've tried many others and when I'm playing classical saxophone (my undergrad degree), I use Vandoren but I don't play classical sax anymore, I play jazz and other contemporary music so I use Rico. The picture here shows the coveted "orange box" variety which unfortunately, I don't have anymore. These old orange box reeds have taken on a mythical status. Not sure if they actually play better but everybody sure wants 'em and they aren't readily available. Maybe therein lies the neurosis of many a saxophone player when it comes to reeds. Let me know if you have a bunch you want to unload - just shoot me an email. I digress. 

The reason I use Rico reeds is they have heart. By heart, I mean cane in the right spot - the middle of the reed. The pic below illustrates what I mean:

Picture
Simply put, if you don't have a reed with heart, your tone will suffer (read: suck). You can dress it all up with your $900 Guardala mouthpiece but it won't matter one bit. You'll still sound bad if your reed has no cane in it.  There are multiple companies making reeds and there are several different varieties within each brand so you do have choices. To me, the choice is pretty clear, but if you have a different reed you like to use, that's fine. When you look at the reed in the light, you should see something like the picture above. Of course, it still doesn't mean it's going to play like you want.

Make sure the entire reed is wet by putting both sides in your mouth - the saliva acts as an adhesive - and then put it on your mouthpiece. Take a deep breath and blow. What does it feel like? Too hard? Too soft? Just right? Make a note and repeat the process for another 5-10 reeds. When I say make a note, I mean literally, take notes on which reeds play better to you than others. I actually write on the reed (H = hard, S = soft, check mark = OK) but you can jot down your notes on a piece of paper if you want. The point is to separate the wheat from the chaff. When you have your pile of good reeds together, go ahead and play through them all one more time and put them in order from best to worst. I will number them from 1 to n so I know what I'm working with. Be sure not to discard the other reeds you have tested because reeds have a tendency to change over time. Go ahead and put the reeds you aren't using today back in the box for a later date. Please trust me on this one. It may be that those reeds never play but I bet you'll find a few good ones during your next reed finding adventure.

After I've sorted and ordered my reeds, I then begin a two-step process to make them play even better. This process involves a  a technique called "lengthening the reed" and "balancing the reed". Both techniques involve a reed knife and lots and lots of practice. Drop me a line if you are interested in learning more about how to create the perfect reed.

0 Comments

Transcribing

6/1/2019

2 Comments

 
Picture
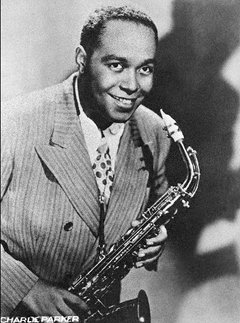
One of the best and fastest ways to improve your improvising is to transcribe solos of the great jazz masters.  There are lots of books published which contain volumes of solos but if you truly want to cop someone else's licks, you've got to get your hands dirty and learn 'em off the record. Trust me, I own a bunch of solo books and have collected reams of transcriptions over the years but the licks and phrases that have stayed with me are the ones I took down myself the old-fashioned way. There's no secret here - you must listen, listen, listen and when you are tired of listening, take a break and then come back and listen some more. Memorize, by ear, every lick and phrase and here's the key - be able to sing, note for note, the solo you are attempting to transcribe. The process of actually writing the solo down (if you choose to do so) will go so much faster if you've memorized it first. And after all, isn't that the point of transcribing? To internalize the music of someone you'd like to emulate? Bird took all of Lester Young's recordings into the woodshed and copped 'em all. He didn't write 'em down, he just memorized them all and digested the very essence of Pres. Many students are overwhelmed by the task and don't know where to begin. It's easy: choose a recording you love to listen to. It's really that simple. Don't get wrapped up in the technique or the chords or anything else but the love of the music and your desire to learn it. Choose one track off the recording you love and choose one solo from that track. Listen critically. Listen over and over. Sing along with the solo. Try to sing the inflections. Sing the dynamics. Memorize the solo and be able to sing the solo before trying to play it on your instrument. Please believe me that you will learn the solo SO much faster if you can sing it first. Once you have it memorized, try to play along with it. This may take several attempts and it's perfectly fine to start and stop along the way. I usually will focus on one measure at a time and I'll repeat playing that measure over and over until I get it and then I'll start at the beginning once more and play up until the point where I add another measure. Is it slow going? Yes. Is it challenging? Yes. Is it worth it? Absolutely. As Ellis Marsalis once told me when I was complaining to him about how tough NYC and the jazz scene was: "if it were easy, everyone would do it." Mouth shut and message received. Nothing worth having is going to come easy so if you want to solo like Wayne Shorter, you'd better be willing to put in the time because I guarantee you Wayne did. Here's a copy of the transcription I did of Wayne's solo on Speak No Evil. Enjoy and happy transcribing.

speaknoevil_waynesolobb.pdf
File Size: 41 kb
File Type: pdf
Download File

2 Comments

How Composing Improves Your Playing

5/1/2019

0 Comments

 
Picture
The real composer thinks about his work the whole time; he is not always conscious of this, but he is aware of it later when he suddenly knows what he will do. --Igor Stravinsky

Part 4 of my practice routine to become a better musician involves composition. I usually get a few puzzled looks from saxophone students when I bring this up as it is not always immediately apparent to them what the connection is between playing your instrument and composing. To me, the two disciplines are closely related and working on composition will absolutely help you to become a better player and improviser.

The Stravinsky quote is a good one to illustrate just one of the ways working on composing helps you with your musicianship. We've all had those moments where we've obsessed on a problem, a project, a person, or whatever. You are hyper-focused on getting it done, working it out, solving the equation, but for whatever reason, the answer doesn't come right away. We sleep on it, or step away from the computer, or take a walk to clear our minds and later, we get an idea or an answer to the question that helps to reach the goal. The same is absolutely true in music and composing is the "walk to clear our minds" that will unlock answers to your other musical questions.

Unlike the other steps in my routine, I don't have a prescribed exercise to start composing however, I will break it down into a few different approaches. First and foremost, you must learn other compositions. Another great Stravinsky quote that I use often is "great composers do not imitate, they steal". The only way you steal is if you learn, note for note and chord for chord someone else's composition. Most young improvisers and jazz musicians start by learning what the jazz community call standards. These are songs from the jazz lexicon that many greats have played and recorded over the years. Something like All the Things You Are by Jerome Kern and Oscar Hammerstein or I Thought About You by Van Heusen and Mercer. This approach is solid and the results manifest themselves in many ways. By learning these tried and true compositions, students learn melody, which is useful when identifying chord shapes and colors (I.E. the first note of All the Things You Are is the third of an Fmin7 chord), they increase their repertoire, and they begin to understand basic harmonic motion like ii7-V7-I. Students also learn form, or the basic structure of how a song is put together, and they also learn rhythm, by exploring key rhythmic figures within the melody of the composition. Internal time can also be improved by practicing the composition on your horn with a metronome, taking care to play the melody exactly in time and in rhythm.

What I describe above is a very high-level overview of the benefits of learning a song. There are many more, trust me. How you learn it is up to you, but I recommend making sure you have a good recording of a master playing the tune and then sitting down with this recording for a good, long time. This will be your reference guide. The picture I posted with this blog entry is my transcription of Wayne Shorter's tune, Hammerhead (there's a mistake in the transcription -- do you know what it is?) I usually take down the melody first and go back and add the chord changes. Again, how you learn the tune is up to you because I feel that each student must discover his or her own way. Some play along with the recording and memorize the melody and chord changes without ever writing anything down. Some will use sheet music (like the Real Book) as a reference and learn by repetition, playing the song over and over again with a metronome. Word of caution and advice: if you chose to use the Real Book or Jamey Abersold play along books, please double check the melody and chords with an actual recording! Many of the charts in the Real Book are incorrect -- wrong chords and wrong notes abound. I learned this the hard way and you do yourself a huge disservice by skipping the source material. Don't be afraid to use your ears, they will work!

So to recap, learning other's compositions is a fantastic way of improving your musicianship and can often lead to other discoveries. Be patient with this step. If you've never learned a song before, the process can be very time consuming. Picking out chords and melodies is a delicate and often grueling exercise but please believe me that it will pay big dividends later. In future composition posts, I'll go into some detail about how to make the jump from learning tunes to actually composing your own songs,  which is another great way to tap into your own creativity and improve your playing and overall musicianship.

0 Comments

Practicing Improvising

4/1/2019

0 Comments

 
Picture
You've got to learn your instrument. Then, you practice, practice, practice. And then, when you finally get up there on the bandstand, forget all that and just wail. --Charlie Parker

Many students struggle with the leap from technique practice to actually improvising and creating their own melodies. I'll be the first to admit that it's not easy, but there are a few things you can do to practice improvising and make the transition from practice room to bandstand less intimidating.

The reason I love this Bird quote is twofold: 1. Bird practiced his butt off. He wasn't some alien being that God dropped on the planet who magically started playing bebop. In fact, he spent 10 years practicing and playing in swing bands before the notion of bebop was conceived. The lesson here is that everyone, including Bird, must practice and apply that practice before any real change or personal style emerges. 2. It's clear that Bird sees creating and improvising as a much different animal than shedding in the practice room. He doesn't go into great detail so what exactly does he mean by "forget all that and just wail?" Well, I'll attempt to break it down for you.

The first concept that most young improvisers fail to grasp is that you are improvising RHYTHMS in addition to MELODIES. In fact, rhythmic integrity and variation is the foundation of good improvising. In today's harmonic/melodic environment where anything goes (there are no wrong notes), I encourage students to focus on practicing improvising using a basic rhythm first. Always remember - It Don't Mean a Thing if it Ain't Got That Swing. If you aren't in the pocket and playing with solid rhythmic integrity, it simply does not matter how hip your melodies are. No one will hear them because they'll be thinking "man, that cat cannot swing."

First, place your metronome with your tuner on your music stand and turn them on (notice a pattern here?) Set your metronome to about 66 bpm. Then, take a basic jazz rhythm like quarter note followed by 4 eighth notes followed by a quarter note rest. That combination of notes and rests equals one full measure in 4/4 time.

Picture
You'll notice that that in the example, I'm simply using that rhythm and going up the C major scale. The notes do not matter. Let me repeat - the notes do not matter. Play whatever notes you want but you must make sure you are playing the rhythm in time and swinging. Next, add some rhythmic variation. Here, I changed the two eighths on beat two to a triplet. I'm still within the C major scale but again, don't worry so much about the notes. Focus on the rhythm.
Picture
As you become familiar with the rhythm you are practicing and you start to understand the concept of rhythmic practice, you can branch out a bit and start to incorporate different tonal shapes. Try playing the rhythm above within a C melodic minor scale or a C diminished scale or a C augmented scale. Please do not jump immediately to trying out the different tonal centers and shapes without first mastering the basic rhythm you are practicing. If you do focus on one sound or tonal shape, make sure you are really focusing on it and staying within that scale or shape while consistently emphasizing the RHYTHM. 

The next step, as you grow comfortable with the rhythm, is embellishing that rhythm, being very careful to stay within the groove. Here's a potential variation on the triplet rhythm stated above.
Picture
Again, I'm staying within C major but the notes do not matter - you can play any notes you want as long as you are swinging the rhythm and staying right in that pocket. Any time you feel the groove slipping away, stop and go back to the basic starting rhythm. Remember, you are practicing rhythms first and melodies second. 

This exercise does a few things to help bridge the gap between practicing scales and licks and actually improvising. Primarily, it gets you out of the mindset of notes and into rhythms, which are really crucial to interacting with a rhythm section and building a solo via motivic development. A motive is a short rhythmic and melodic phrase on which you can build your improvisation. When I think of Sonny Rollins, I think of a great master of motivic development. He will take one rhythmic phrase and build an entire solo out of that rhythm. It also makes you focus on swinging - always placing your rhythms in time. Remember that if you aren't swinging, it simply ain't happening.

Try this rhythmic practicing concept over a tune you are learning. Start with a tune with minimal key changes like a blues or a rhythm changes and see if you can shift the focus from "making the changes" to "making the rhythms". Constantly build on your motives and vary the rhythms within the basic rhythm. I think you'll find that a new door will open for you and you'll start to think about truly improvising and building on motives rather than trying to insert lick #142 into the turnaround before the top.

There are few who reached the level of proficiency and genius of Bird, but if you get inside this famous quote from him that started this lesson, you can start to unlock a couple of key concepts. First, you must practice - learn your horn! I equate that to tone and technique practice in my regime. Second, "forget all that and just wail". It's not quite that simple, but I believe what he meant was to use your instincts, play with conviction, never forsake the groove, and don't be afraid to take a few chances. Practicing your rhythms can help you do this.
0 Comments

Improving Technique

3/1/2019

0 Comments

 
Picture
The second part of my 4-part practice routine is dedicated to improving your technique. There are myriad books, online courses, websites and methodologies addressing saxophone technique and I would guess that technique is what most aspiring players focus 90% of their practice time on and from my experience, what and how to practice technique also drives a lot of confusion and "practice paralysis". Some students get overwhelmed with how much information there is published on the topic and don't know where to begin or how to systematically address the issue of improving their saxophone technique. The real key here is to focus on just one type of exercise and to master it using a tuner and a metronome.

For me, the building blocks of technique are scales. Major scales, all three forms of minor scales (natural, harmonic, and melodic), diminished scales, and whole tone scales. There are lots of variations here (modes, blues, be-bop, etc.) but for the sake of this discussion, we will focus only on major, minor, diminished and whole tone.

As always, place your metronome and tuner on your music stand in front of you and turn them on. Set the metronome on a reasonable tempo - somewhere between 60 and 80bpm and start with C major in the middle of the horn. Play the C major scale from middle C all the way up to high F, then all the way down to low B, and then back up to middle C using 1/8th notes as the rhythm. Be sure to play with a full, even tone and in addition to playing exactly in time, make sure that you are centering the pitch of each note, using the tuner as your guide. Don't worry about doing the entire scale on one breath. When you are near the end of your breath, simply stop, take a big breath and then begin again on the next beat. The point of the exercise is not to play the whole scale on one breath, the point is to play the entire range of the instrument in time and in tune and at a tempo that allows you to remain in control for the entire scale. 

Repeat this for every major scale, playing to the top of the horn, back to the bottom of the horn, and returning to the starting note in the middle of the horn. Depending on what key you are in, the top note and the bottom note of the exercise will vary and that's OK. For example, the top note of the exercise in C major is F and the bottom is B. The top note of the exercise in B major would be either E or F# (depending on whether or not you have a high F# key on your horn), and the bottom note would be low A# (or Bb). Again, the point is to play the full range of the instrument (no altissimo) within the key that you've chosen. Make sure you are honest with yourself and do not proceed to the next scale until you have played the one you are working on perfectly. Take extra care to play exactly in time, in tune and with expression. When you have completed all 12 perfectly, go ahead and increase the tempo a few bpm and repeat. Please do not rush to get to a fast tempo - you then defeat the purpose of the exercise. You must be methodical and you must be honest with yourself. Making mistakes means you are giving yourself a chance to improve! 

I usually tell the story of the great cellist Yo-Yo Ma who would set up 5 matchsticks and when he played a passage he was working on perfectly, he would take away one matchstick. He would then play the passage again and if he played it perfectly, the 2nd matchstick would be removed. Played perfectly a third time in a row, and the third matchstick would be gone. Played perfectly on the 4th try, the 4th matchstick disappears. One mistake on the 5th try and all 5 matchsticks return to their starting position. Practice does not make perfect. Perfect practice makes perfect.

Once you've done this for all your major scales, repeat in the same fashion for all of your minor scales (natural, harmonic, and melodic) as well as your diminished and whole tone scales. I would advise focusing your efforts on only one of these options per practice session I.E. only major scales or only harmonic minor scales or only diminished scales, etc. This way, you can really focus on that tone color and master those sets of scales.

I cannot emphasize enough the need to master all of your major, minor, diminished and whole tone scales. They are the building blocks of all Western music, regardless of your preferred style. This exercise, of course, is just one of many when it comes to practicing scales and in future blog posts, I'll share some of my personal favorites.

0 Comments

Long tones

2/1/2019

0 Comments

 
For any saxophone player looking to develop a beautiful tone, a practice routine that involves long tones is a must. If you decide to skip this important part of your development, then you are depriving yourself of one of the most fundamental aspects of playing your instrument well.

I break my practice routine down into 4 distinct parts: 1. Tone 2. Technique 3. Improvising 4. Composition. Today, I'll give you an effective exercise to improve your sound and control and yes, it involves long tones.

First, set up your metronome and tuner on your music stand and have them both on :) Set the metronome to 80bpm. Pick a major scale - it doesn't matter which one - and start in the middle of the horn. For the sake of clarity, I'll pick C major and start on C without the octave key. Take a big breath - really fill your lungs with air - and play the middle C as softly as you can. Play the note for 16 beats, with a gradual crescendo to as loud as you can play (with a nice sound) by the 8th beat. Gradually decrescendo to as softly as you can play with a nice sound over the next 8 beats. This should all be done with one breath while you are looking at the tuner to make sure you keep the pitch centered during the entire exercise. Do not move on to the next note in the scale until you have played this one perfectly. Repeat this for every note in the scale up to the very top of the horn (high F) and back down to the bottom of the horn (low B) and back to middle C.

Not so easy, is it? Here's the deal: if you practice this exercise daily, and really make sure that you are controlling the sound, playing the dynamics, and staying in tune, this one exercise will dramatically improve your sound, your intonation and your control. Not many people have the discipline to do this but if you stick with it, it will pay dividends!
0 Comments
Booking and contact:
cherrywoodrecords@gmail.com
All content © 2020 Elias Haslanger
Terms | Privacy | Listen